
May 20, 2016
How to Send Messages Using the SMSBump Web App
In this tutorial, you will learn how easy it is to start sending text messages with SMSBump.
In one of our other posts, we analyzed the potential benefits of text message marketing for businesses.
Now it’s time to put that knowledge and data to work.
The first step is to sign up in SMSBump.com and claim your Free Credits.
Once you register your account and you are good to go, you can begin sending text messages with the web app.
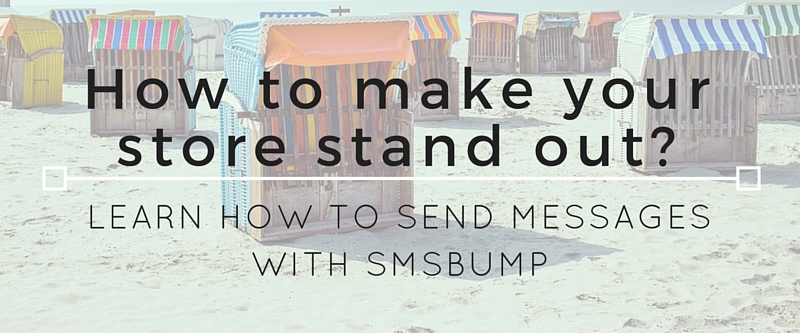
This is how the Dashboard looks when you are logged into SMSBump:
Let’s explain what each field is and show you the step-by-step process.
Sender - this is the phone number that you have used to make your account. It’s the number that messages will be sent from.
Recipients - this field lets you choose the recipients of your text message. There are two options - Specific Numbers (that can be listed in the field below) or Predefined List.
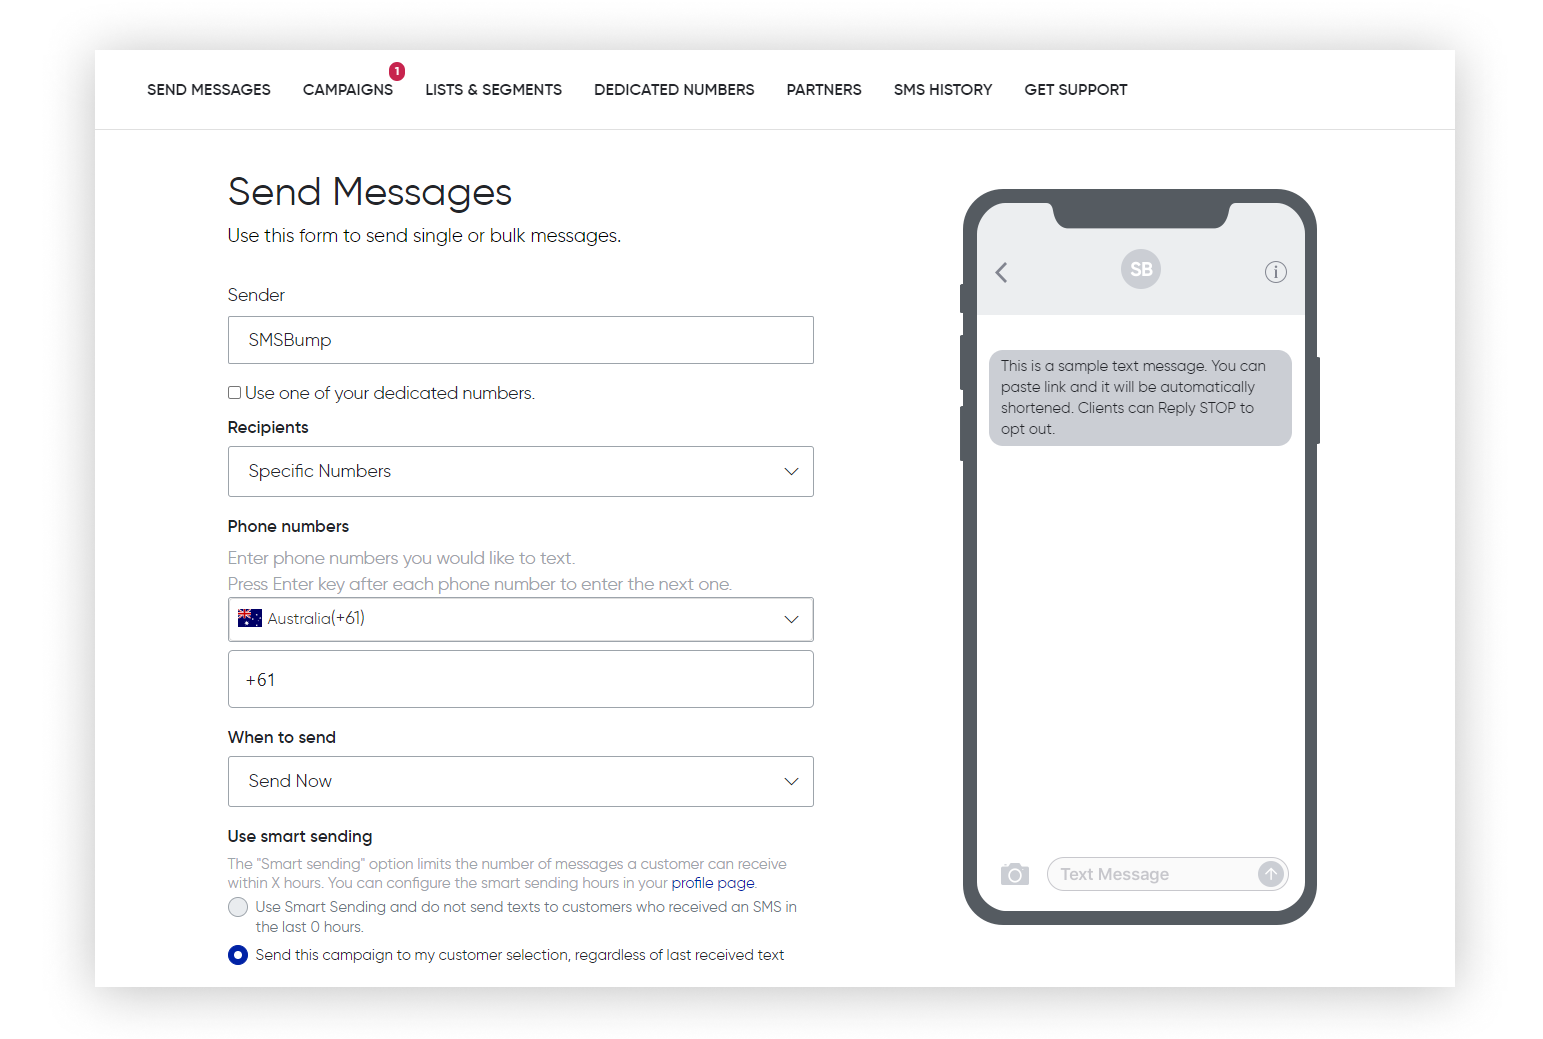
Specific Numbers
Phone numbers - this is where you manually add your recipients.
First, you need to select a country. As soon as you pick one, the country code will immediately appear in the field below. The only thing left for you to do is to type the phone number of the recipient you want to reach.
The phone number will appear in the field below. You can add multiple phone numbers.
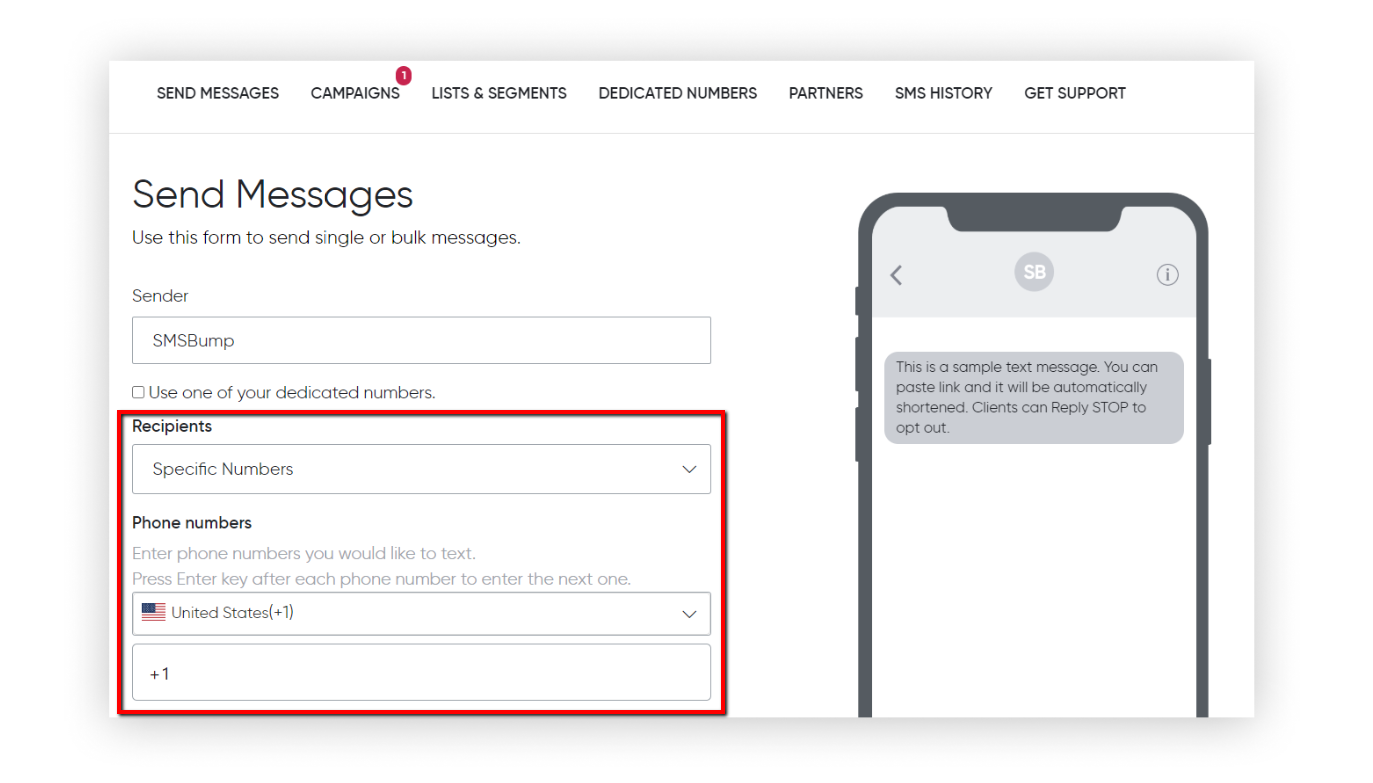
Predefined List
If you select Predefined List, you will see an additional field appear where you can select the list of recipients that you have to create.
Visit Lists to create your predefined list.
Now it’s time to choose when to send the message.
When to send - you have two options here. You can send the message now or later. If you choose later, you will see an additional field appear.
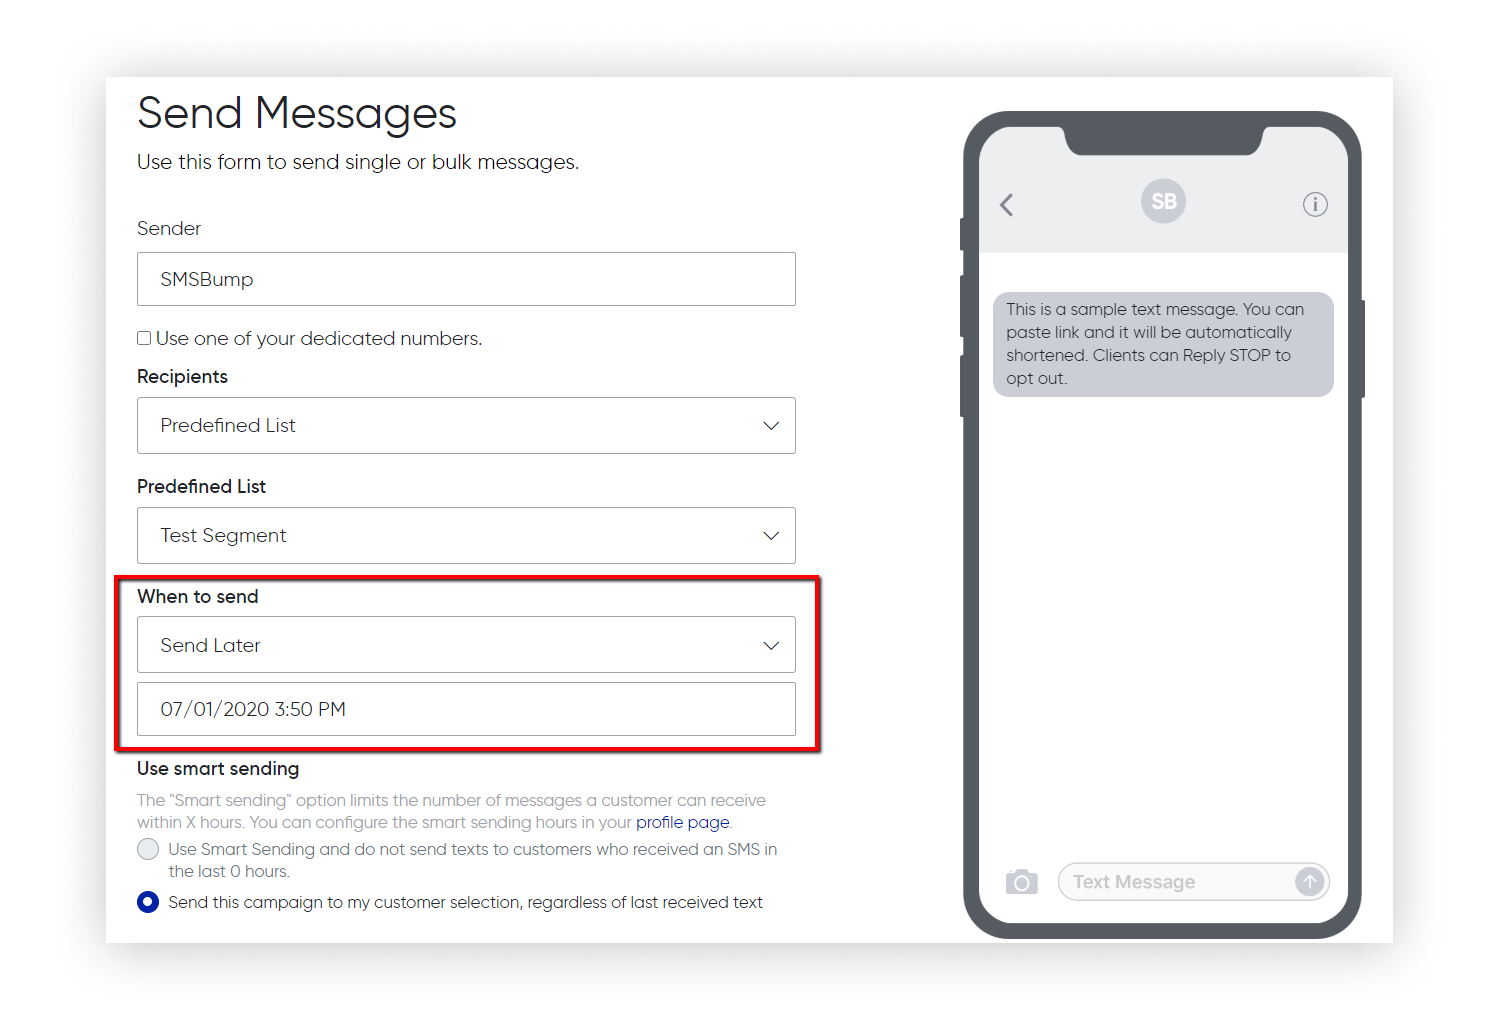
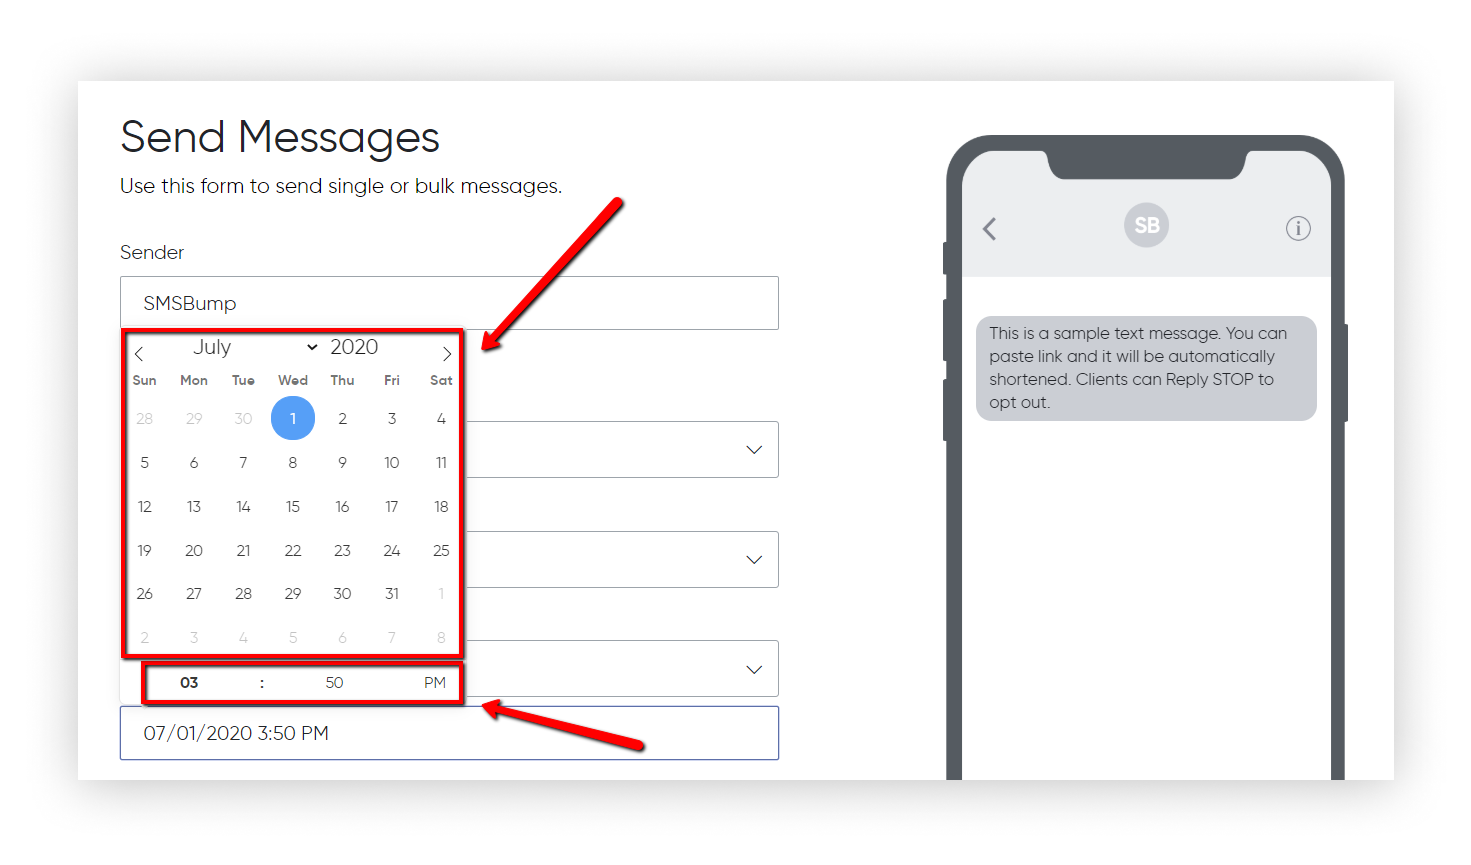
This field has a calendar where you can choose the date when the message should be send. If you have set the date, the next step is to choose the time. If you click on the small clock icon below, you will be able to adjust the exact time when the message will be sent.
 Smart Sending
Next step is to decide if you want to use our Smart Sending feature or not.
If you use plenty of automations and flows through your SMSBump app you might be worried you might spam your subscribers with constant text messages. That is why we have come up with Smart Sending: this feature will give your customers room to breathe between messages. You can now set a specified time frame that will prevent your Shopify store from sending messages too soon one after the other.
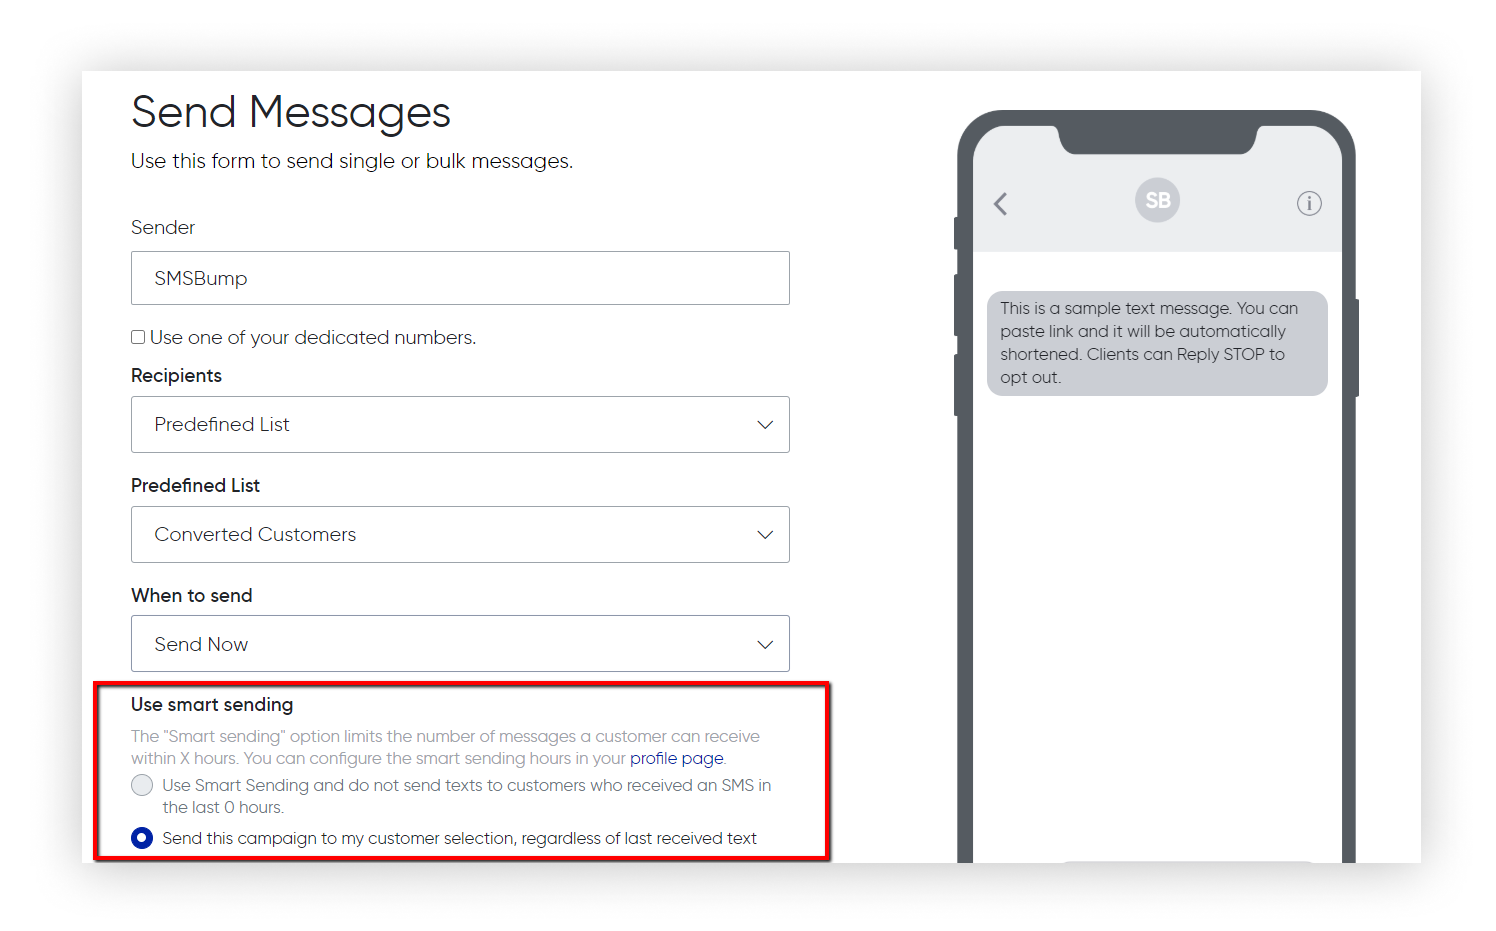 Configure the Smart Sending feature in your profile page and you will be able to start using it for your next text marketing campaign!
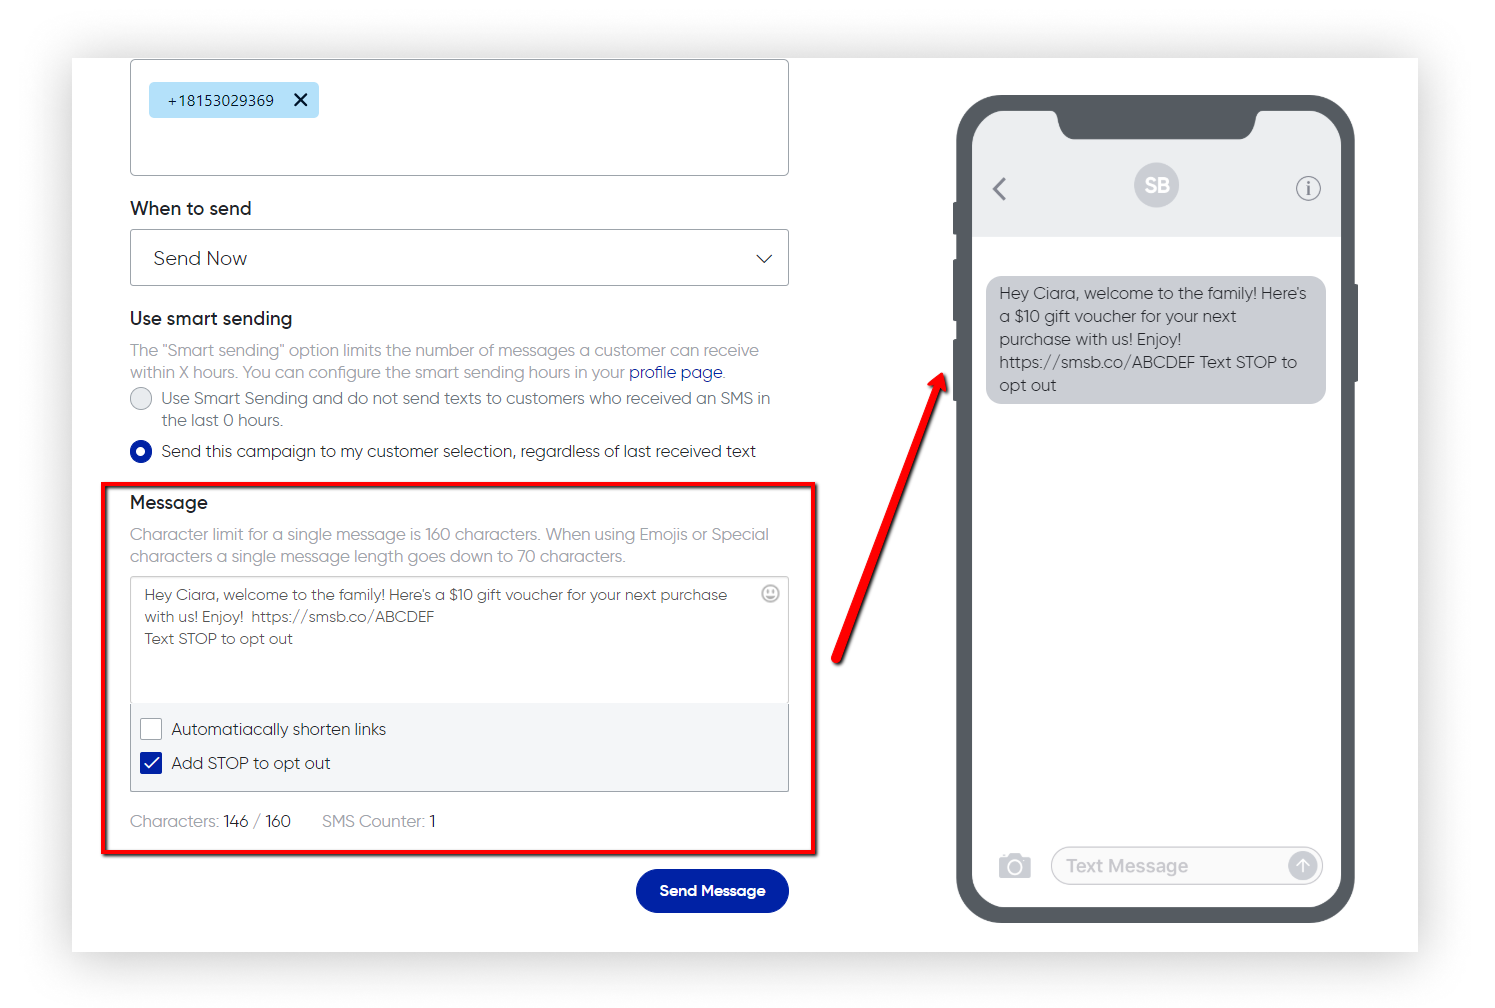
Messages
Message - this is where you define the text message you want your contacts to receive. Make sure to have enough substance as you have limited characters to work with. Remember to be as clear and descriptive as possible. Our tool will help you remain in compliance by adding the "Text STOP to opt out" in the end of your text. Simply click on the box on the left and it will be added!
Example:
Hey Ciara, welcome to the family! Here's a $10 gift voucher for your next purchase with us! Enjoy! https://smsb.co/ABCDEF
Example: This is how an SMS looks like when you write it in the SMSBump web app:
You are now ready to start sending messages with SMSBump! In our next tutorial, we will show you how to create and manage your Contact Lists.

Mihail Savov
Start growing today
Sign up today and join 90,000+ eCommerce businesses making it big with Yotpo SMSBump