
July 30, 2018
Create and Customize Your SMSBump Subscription Form in Shopify
Subscription forms are a great way to gain more subscribers for your future marketing campaigns. Setting up a opt in form is fast and easy. In this guide we will show you some must-haves on how to gain subscribers and offer them a discount for signing up in your list.
Go to Subscription Form
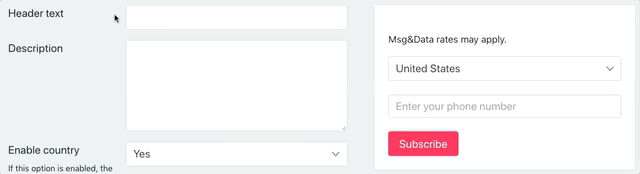
1. Configure the content in Header and Description Text based on your specific needs and strategy.
Video tutorial: Watch here.
2. Make sure to set Enable country option to Yes.
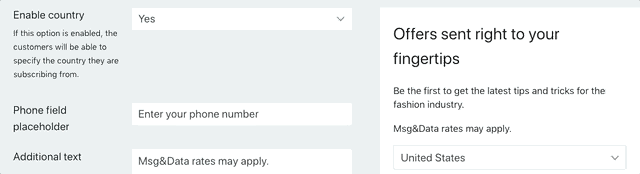
Important: This will allow customers to select their country from the dropdown. Even if they are from your country (For US stores, we strongly encourage to have this option enabled at all times to collect the phone numbers in the proper format).
3. The field Additional Text allows you to add more content to the popup. For Shopify stores based in the US and Canada its mandatory to include “Message and Data rates may apply”.
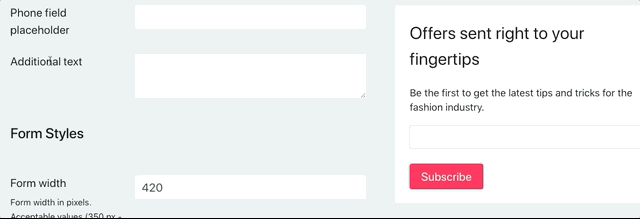
The Form type field lets you choose whether to have the form as a floating widget or a static form that you can place anywhere on your Shopify website.
Important: Our experience shows that both Widget form and Static form (placed on a specially designed page) work extremely well. Especially with the proper wording and offer.
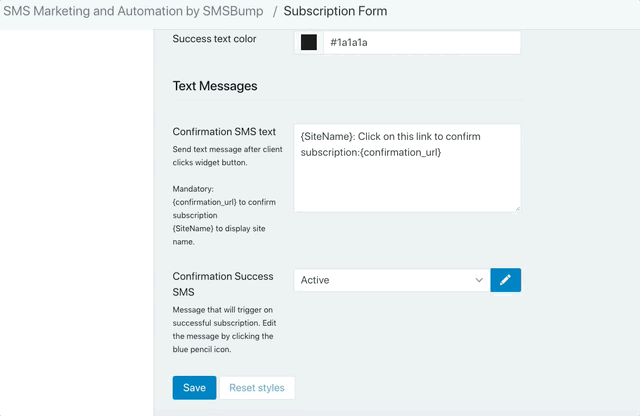
5. Scroll down to the Confirmation SMS text field. Make sure to add your store name in the beginning of the text message so your customers know whom the message is coming from.
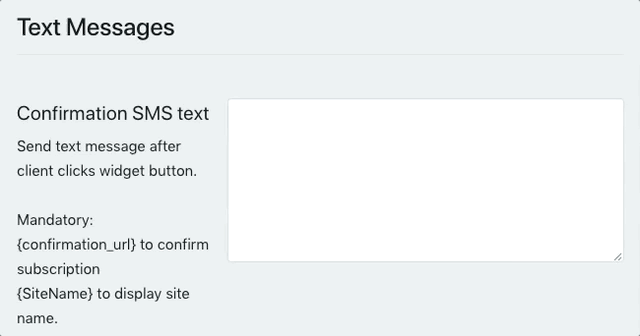
For example: Click on this link to confirm subscription:{confirmation_url}
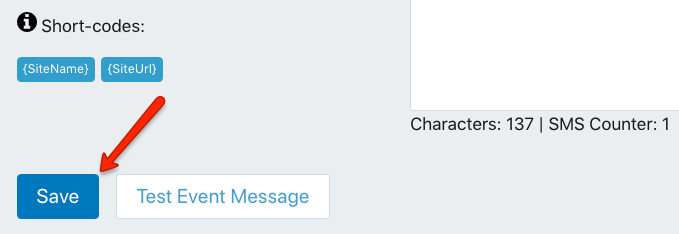
6. Confirm the changes by clicking the Save button at the bottom.
7. Go to the Confirmation Success SMS field. You want to set the form to Active.
8. Now click on the Edit button. A popup will appear. Scroll down to the text message field.
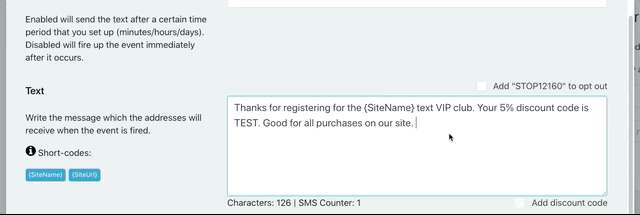
Here is the sample message we recommend.
Thanks for registering for the {SiteName} text VIP club. Your 5% discount code is TEST. Good for all purchases on our site {SiteUrl}
Important: Also don’t forget to Add STOP#### to Opt out in the top right corner.
9. When your message is ready you need to add the discount code to the link. Select the Add discount code checkbox on the bottom left. This will trigger a popup with all your available Shopify discount codes displayed.
Here is a video for more info on how the discount codes work:
Video tutorial: Watch here.
10. Select the discount code you want to use from the dropdown and click Apply discount code.
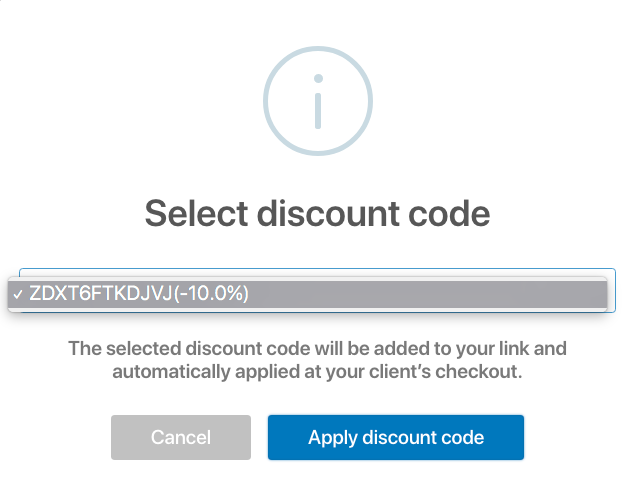
11. Once the discount is applied it will be displayed in brackets.
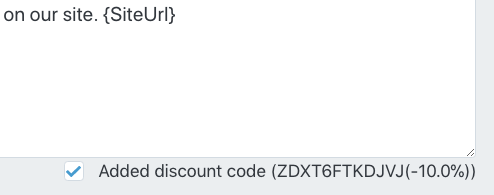
The discount code gets automatically applied when the customer clicks your checkout link.
No need for the customer to enter the code.
12. You are all set here. Click Save to confirm all changes.
After you create a subscription form and a customer adds their phone number, you will send them a text message (Step 5). When they click on the confirmation link, you will send them another text message with a discount code (Steps 7 to 10). You can view all of your subscribers via Lists > Text Marketing List.
This is how to set up the subscription form and so you can get more sales from each customer who signs up. The purpose is to offer an incentive for customers to sign up to your marketing campaigns and promotions by providing attractive discounts.

Mihail Savov
Start growing today
Sign up today and join 90,000+ eCommerce businesses making it big with Yotpo SMSBump